Dashboard
The dashboard is the first page that is displayed when opening Dayshape and can be opened at any time from the main menu by clicking the Dashboard icon:
The dashboard displays key information that is relevant to the user’s role, with many click-through links to other parts of the system. The different charts and tables displayed here are commonly referred to as ‘widgets’.
All widgets are controlled by user permissions and, depending on the user group to which they belong, users may only see a selection of the full range of dashboard widgets described below.
Typical widgets
Quick Engagement Search widget
The Quick Engagement Search widget enables users to search quickly for an engagement, using Engagement Number, Name (of the engagement) or Client Name.
Full or partial entry of a search term containing an Engagement Number, Engagement Name or Client Name will bring up corresponding engagements located in the system. The search results include links which take you to the corresponding Engagement Edit page and to the Gantt (with the selected Engagement displayed in Engagement View).
Engagements of all states (for example In Flight, Approved, Closed) are returned in the search results:
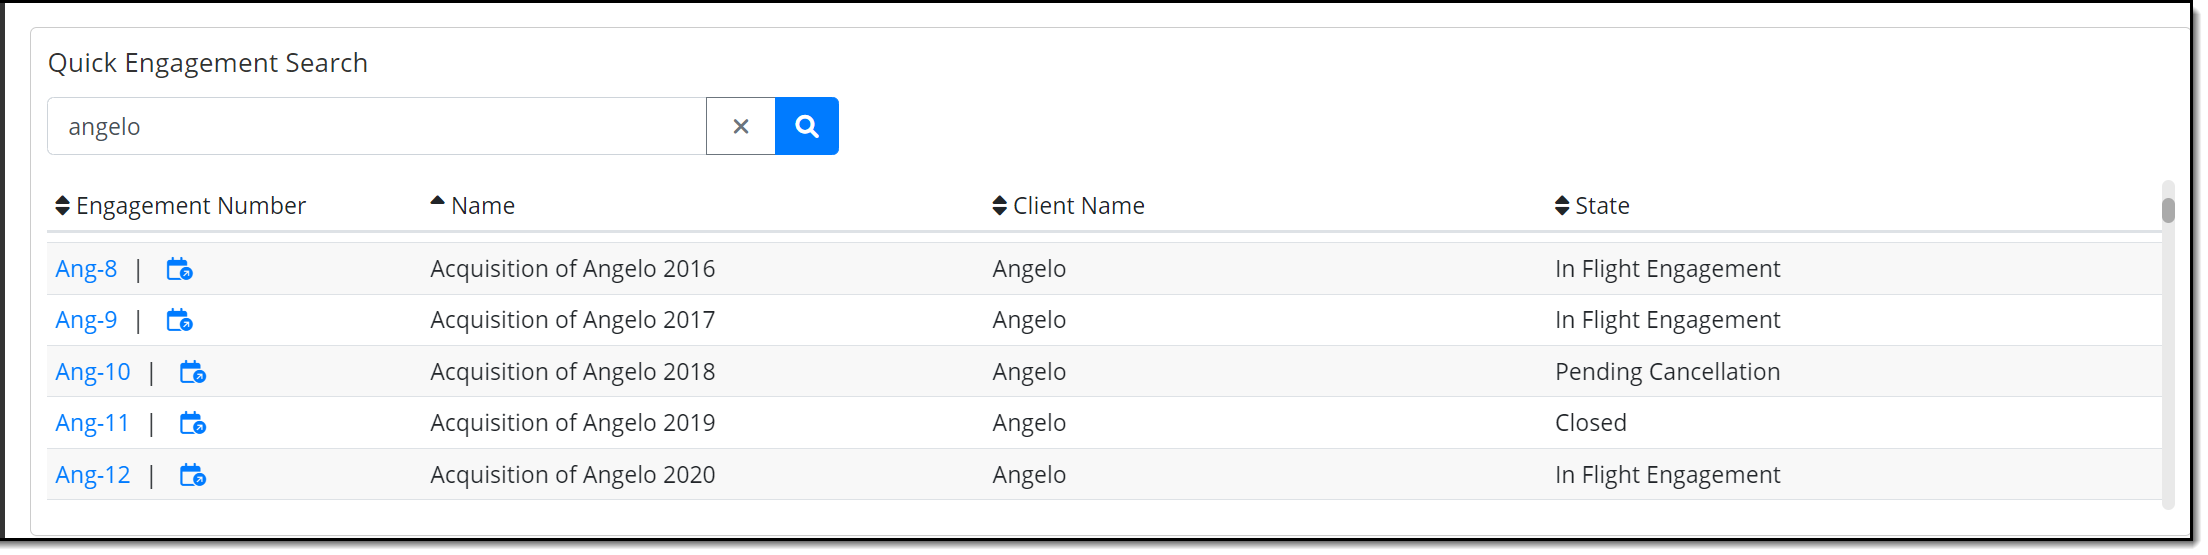
Dashboard Quick Engagement Search results with hyperlinks
Resource Manager Statistics (utilisation) widget
This is a graphical representation of the utilisation data over time. Available Hours, Clashed Hours and Unscheduled Hours can all be seen. A user will only be able to see the information that is relevant as per their Editable Units for Permissions but can always drill down from here.
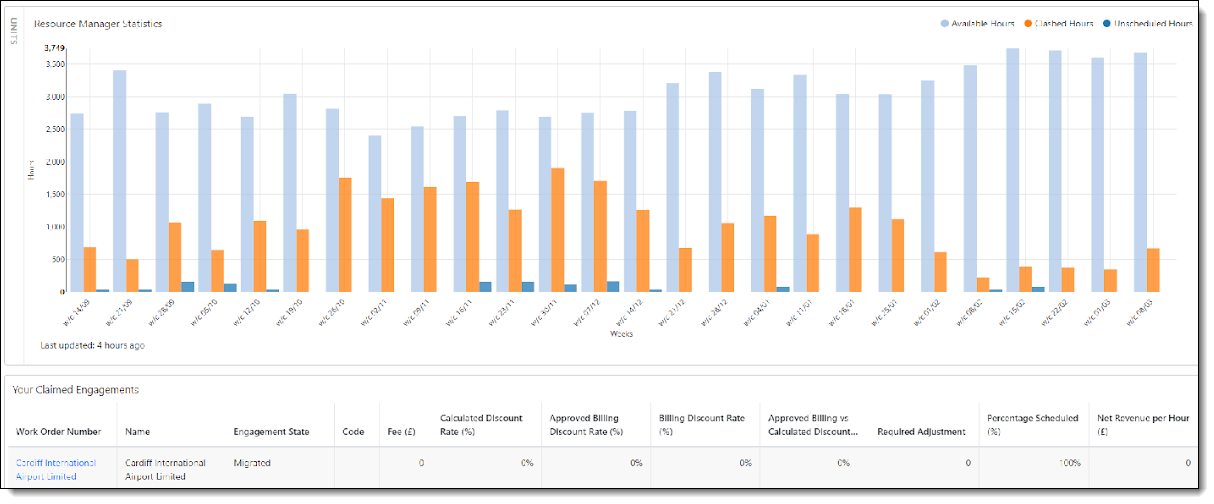
Your Claimed Engagements widget
This widget displays details of all engagements where the user is listed as a claimant.

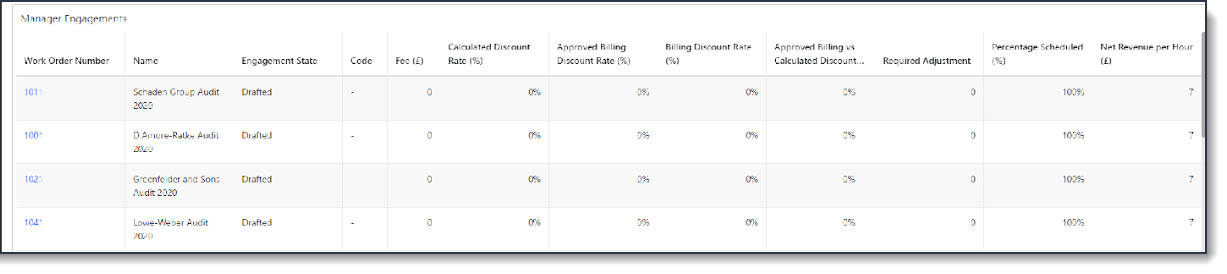
Engagement Manager widget
This widget displays details of all engagements where the user’s linked worker is the named 'Engagement Manager'. Note this does not extend to the 'Secondary Job Manager'. This can be configured to only display specific columns to the user and if any particular engagements should be filtered out (e.g. 'Closed' Jobs). This widget normally includes the Engagement ID column to enable click-through.
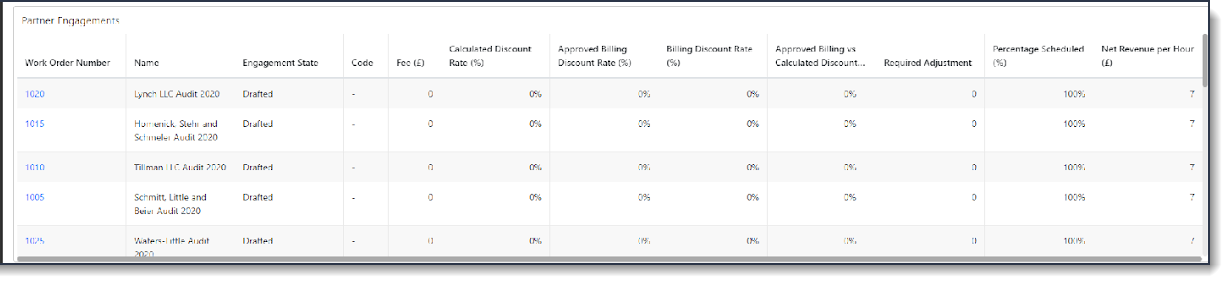
Partner Engagements widget
This widget displays details of all engagements where the user’s linked worker is the named 'Engagement Partner'. Note, as above, this does not extend to the 'Secondary Job Manager' and the data displayed is subject to configuration.
Partner Engagement Groups widget
This widget displays details of all engagement groups where the user’s linked worker is the named 'Engagement Group Partner'.

Customised content
The following widgets are available (subject to dashboard configuration) to improve your operational effectiveness.
Your Saved Reports widget
Reports that you have saved for future use will be displayed as buttons within the Your Saved Reports widget.
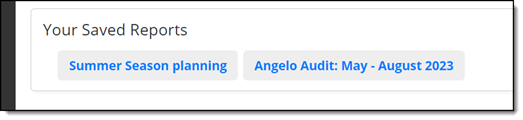
Any reports that you have created, saved and pinned will be displayed here for your convenience. Refer to Saving a Report for information on how to do this.
Saved Gantt Views widget
Gantt views that you have saved for future use will be displayed as buttons within the Saved Gantt Views widget. Click any of the Saved Gantt View buttons to instantly load the Gantt with that view.

Refer to Using Saved Views.
Individual schedule
Your own schedule is displayed as a widget and you can set the date range you would like to view.
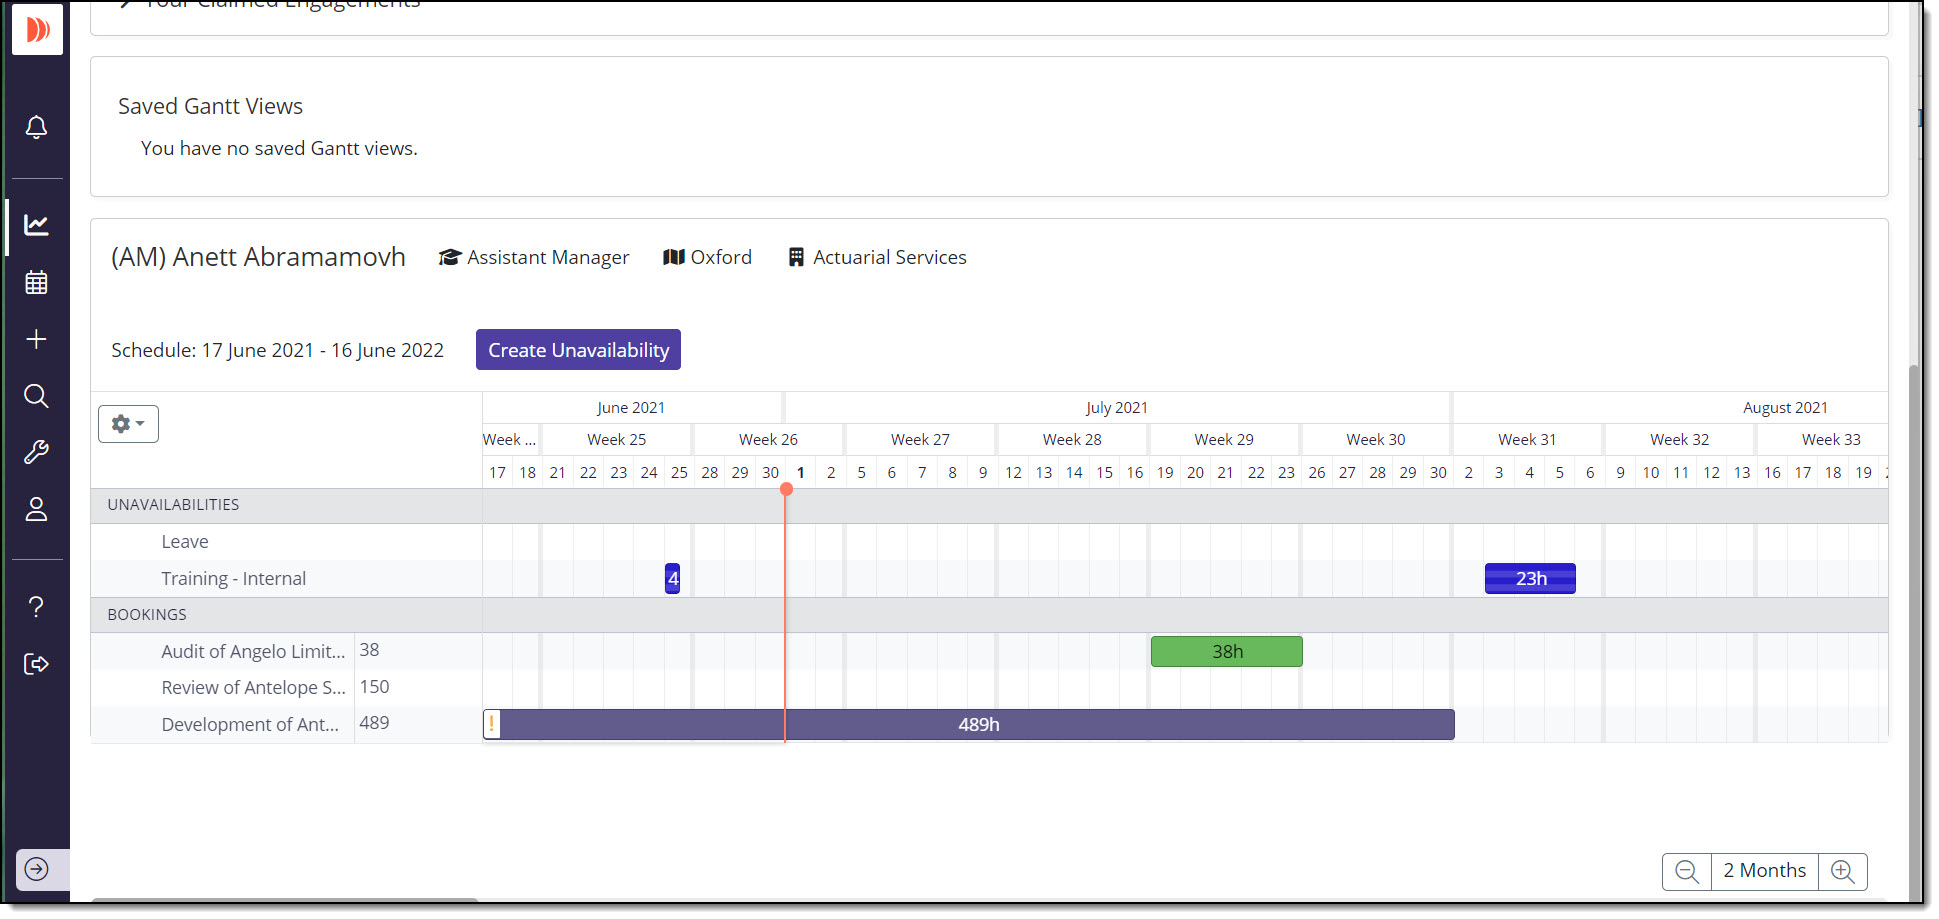
Your Schedule widget
This is a mini Gantt chart that shows the schedule related to a user's linked worker. Bookings and unavailability details are displayed, with click-through links to the relevant engagements.
The main functions are:
-
Gantt Start Date – this is defined within the time settings menu. The Gantt will display a year by default, but days displayed can be adjusted by changing the start date.
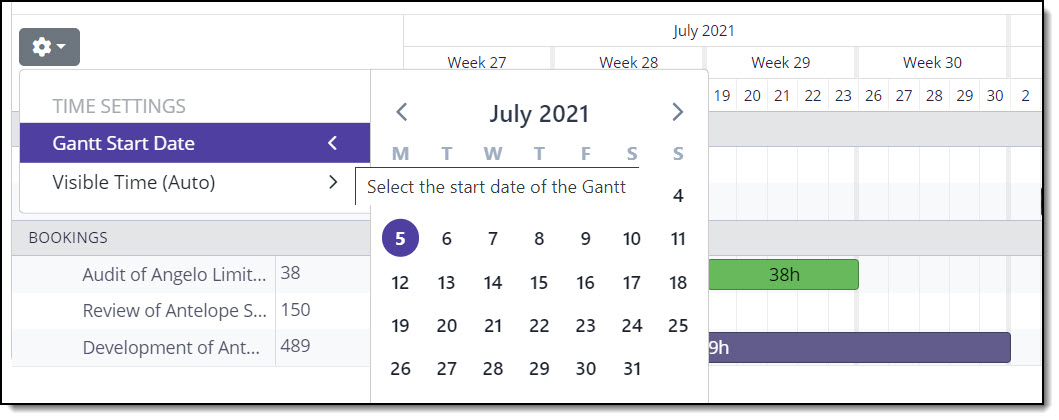
The Gantt Start Date is defined in TIME SETTINGS
-
Visible Time – this is defined within the time settings menu.
-
Auto – displays a 5- or 6-day week depending on the working week configuration of the work rows loaded on the Personal Gantt
-
Extended – the total range between the earliest start and latest finish of the work rows loaded on the Personal Gantt
-
24/7 – A full seven-day, 24 hour view (regardless of working hours or configuration)
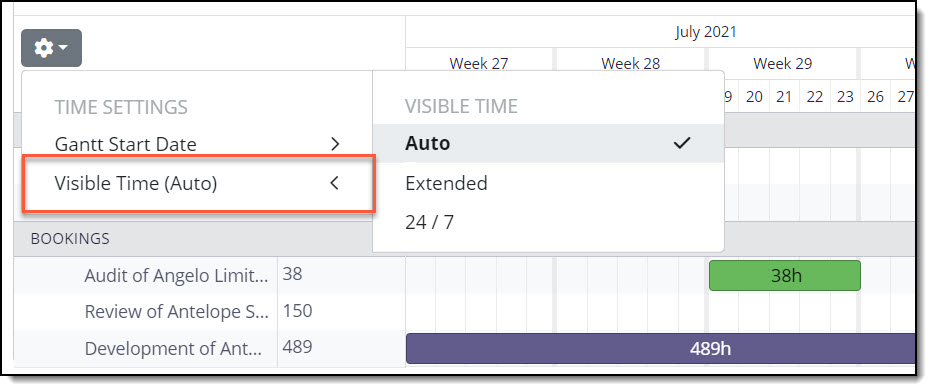
Visible Time on the Personal Gantt is defined in TIME SETTINGS
-
The Gantt Zoom button allows Practitioners to define how much information is shown on their Personal Gantt:
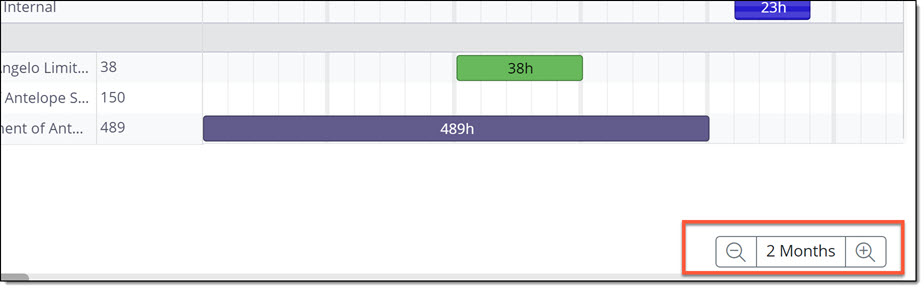
The amount of information shown is defined by the Gantt Zoom button
Practitioners can create and delete unavailabilities directly from the Personal Gantt.
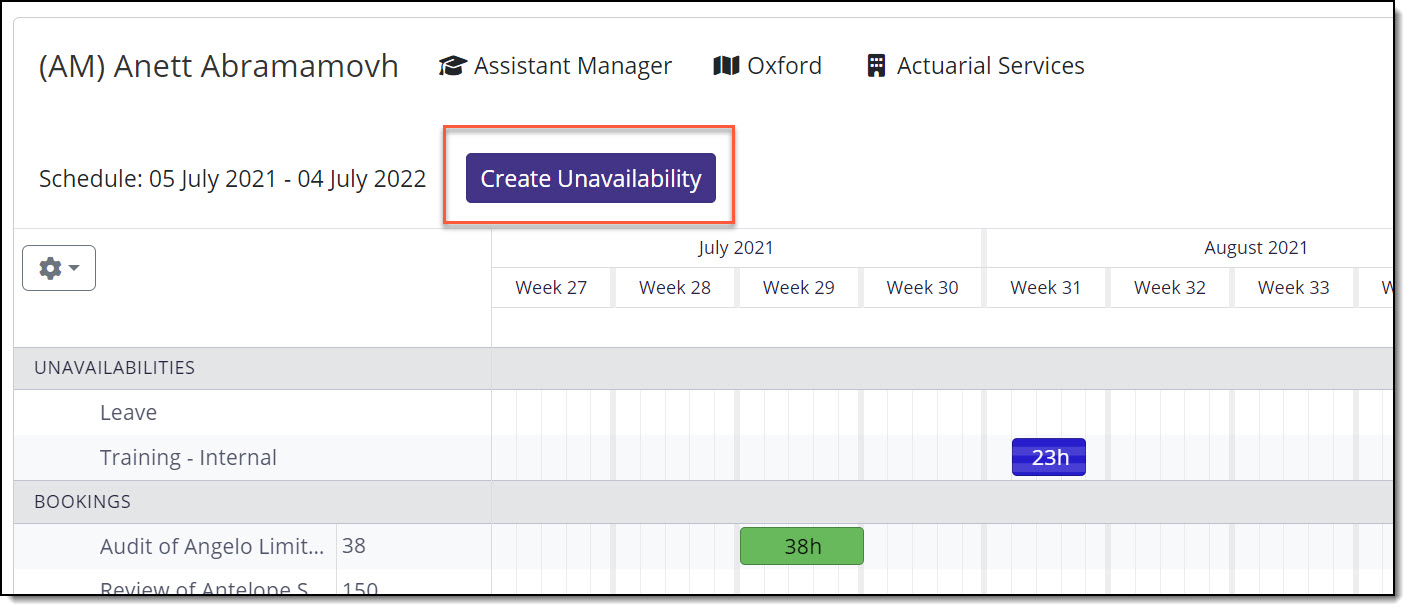
You can create unavailabilities direct from the Personal Gantt
Clicking Create Unavailability opens the Create a New Unavailability modal that can be completed as normal:
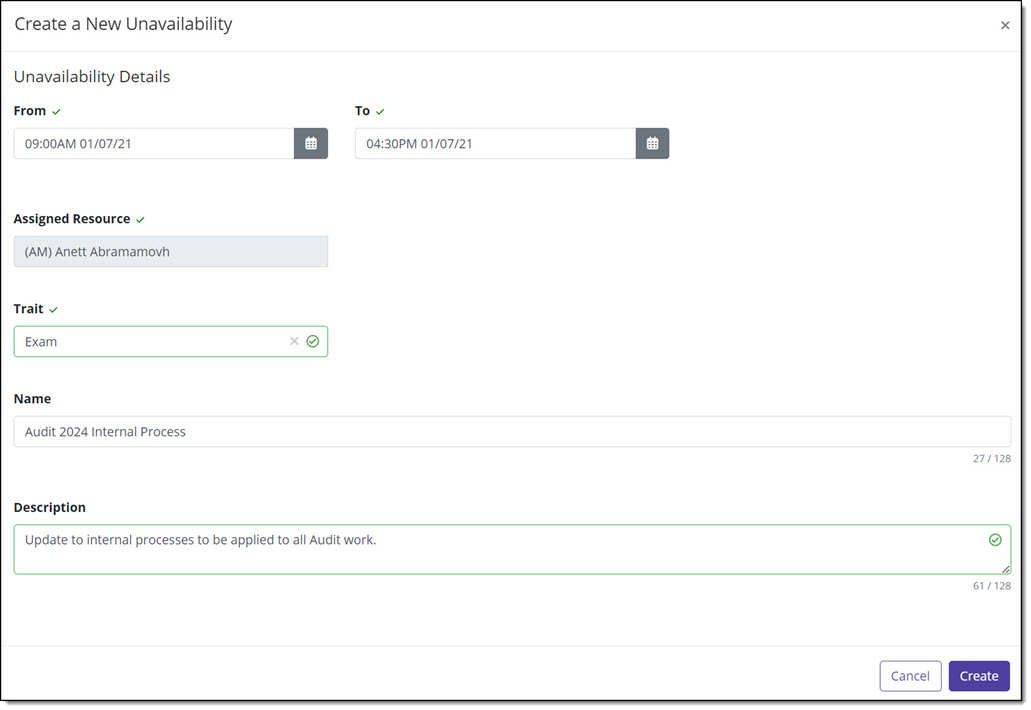
The Create Unavailability modal is completed as normal (from within the Personal Gantt)
Newly created unavailabilities can be viewed as normal and when clicked, display their details in the Gantt sidebar:
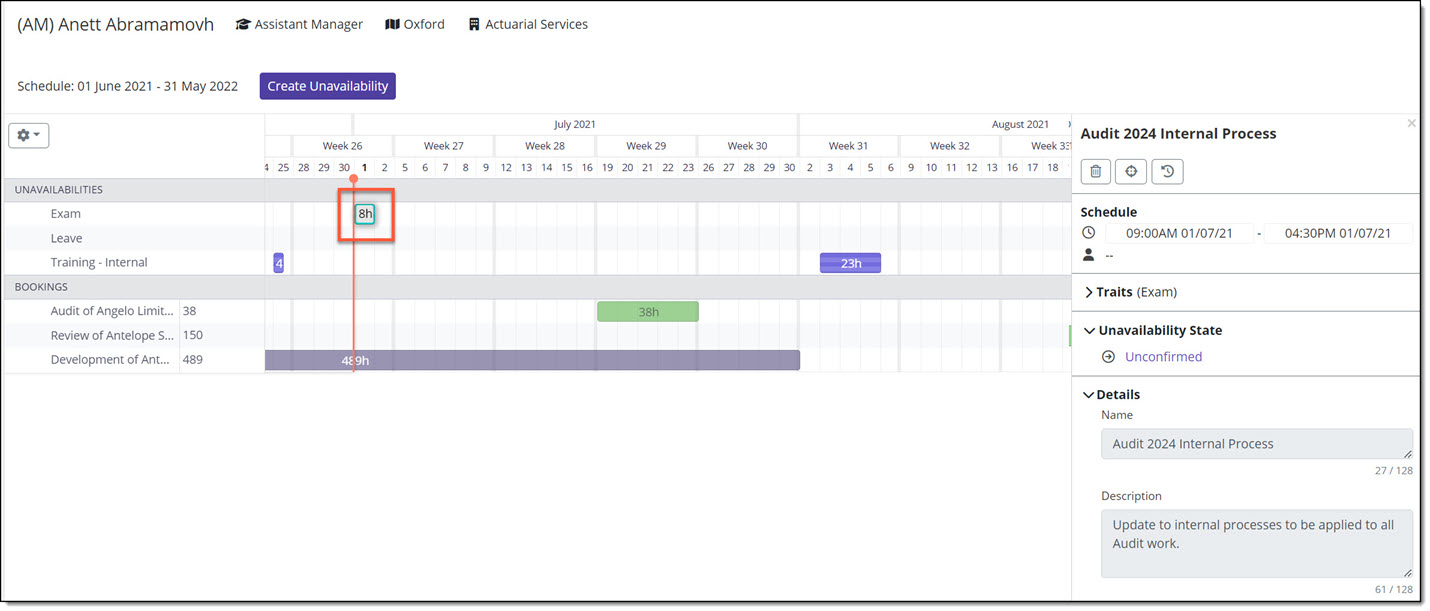
Clicking the newly created Unavailability displays its details in the Gantt sidebar
You can delete existing unavailabilities by selecting them and using the Delete button on the Gantt sidebar or Delete on a keyboard.

Existing unavailabilities can be deleted directly in the Personal Gantt
You cannot edit existing unavailabilities. To edit an unavailability, you must delete the existing one to be changed, and create a new unavailability with the correct attributes that you need.
There is no need to save your Personal Gantt changes as these are saved automatically.